Preparation locations
Preparation locations are what make sure each item lands on the right screen and prints at the right printer.
Creating a preparation location
- Open the Backoffice and select Preparation locations
- Tap the plus button in the bottom right to add a new one
- Give it a name, for example:
- Kitchen
- Bar
- Pastry
- Cocktail bar
Preparation statuses
Choose which steps of the preparation process you track for this location. Unrequested, Requested and Delivered are always on. Want to follow progress more closely, for example on a kitchen display? Turn on Ready to prepare, Preparing, Prepared and/or Ready to deliver as well.
You can rename these statuses under Backoffice → Settings.
Tagging products
Once your locations exist, tag each product with the location it belongs to. See Products for how.
Printing tickets automatically
Open the preparation location in the Backoffice and pick the printer(s) that should print for it under Print on.
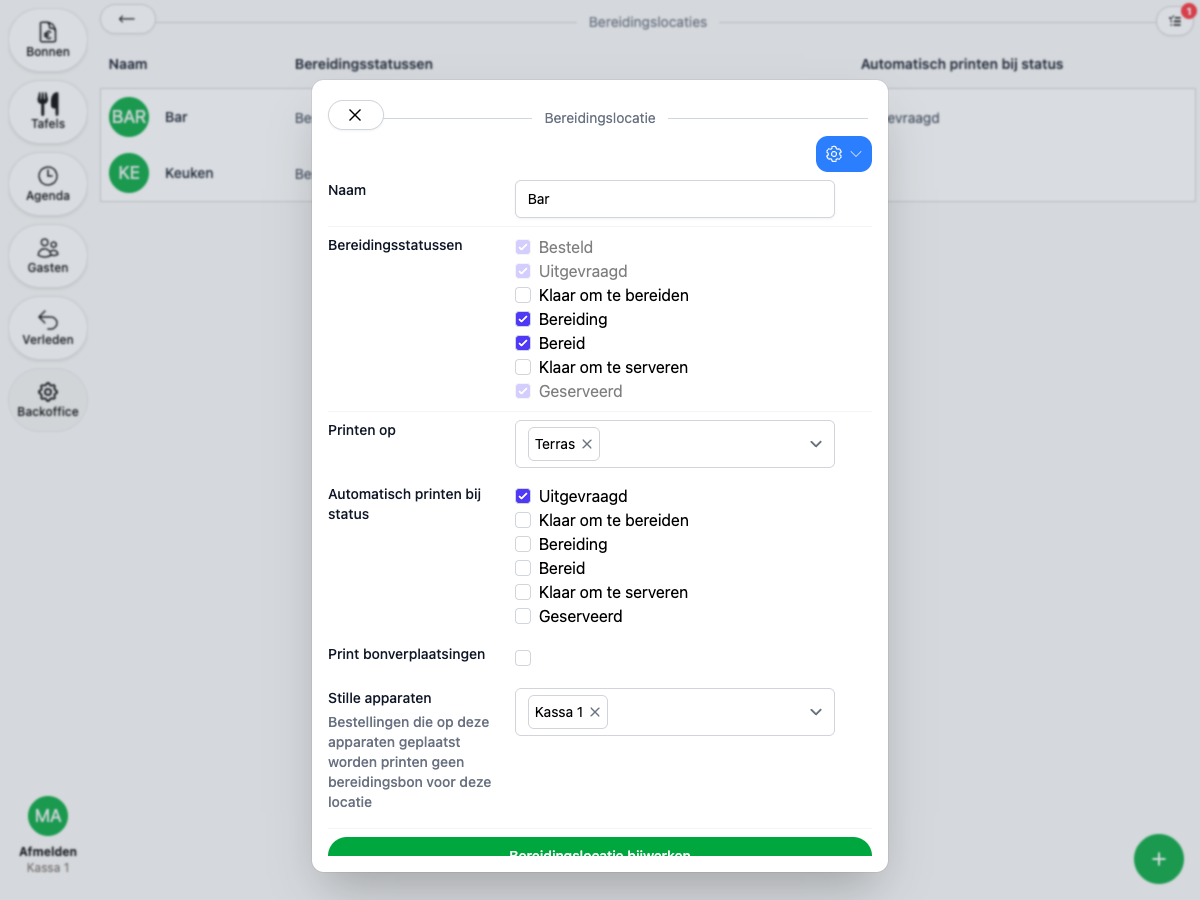
Once a printer is linked, extra settings appear:
- Print on status — choose which preparation statuses automatically print a ticket.
- Print order moves — print a ticket whenever an order is moved to a different table or bill.
- Silent devices — add devices whose orders skip printing a preparation ticket for this location. Think of a register at the bar, or a self-service screen where guests grab the products themselves.
Kitchen displays
Assign the preparation location to the right kitchen displays under Devices in the Backoffice to control what shows up on which screen. Once an order is placed, the preparations automatically show up on the right screen.