
Balance
Customers can hold a balance at your venue. Top it up from the customer’s profile, let customers pay with it at the till, and see every top-up and payment back in the balance history.
Balance is tied to the loyalty card, so turn that on first.
Turning on balance
- Open the Backoffice and click Loyalty.
- Turn on Enabled (the loyalty card itself) if it isn’t already.
- Turn on Customers can have a balance.
- Save with the green tick.
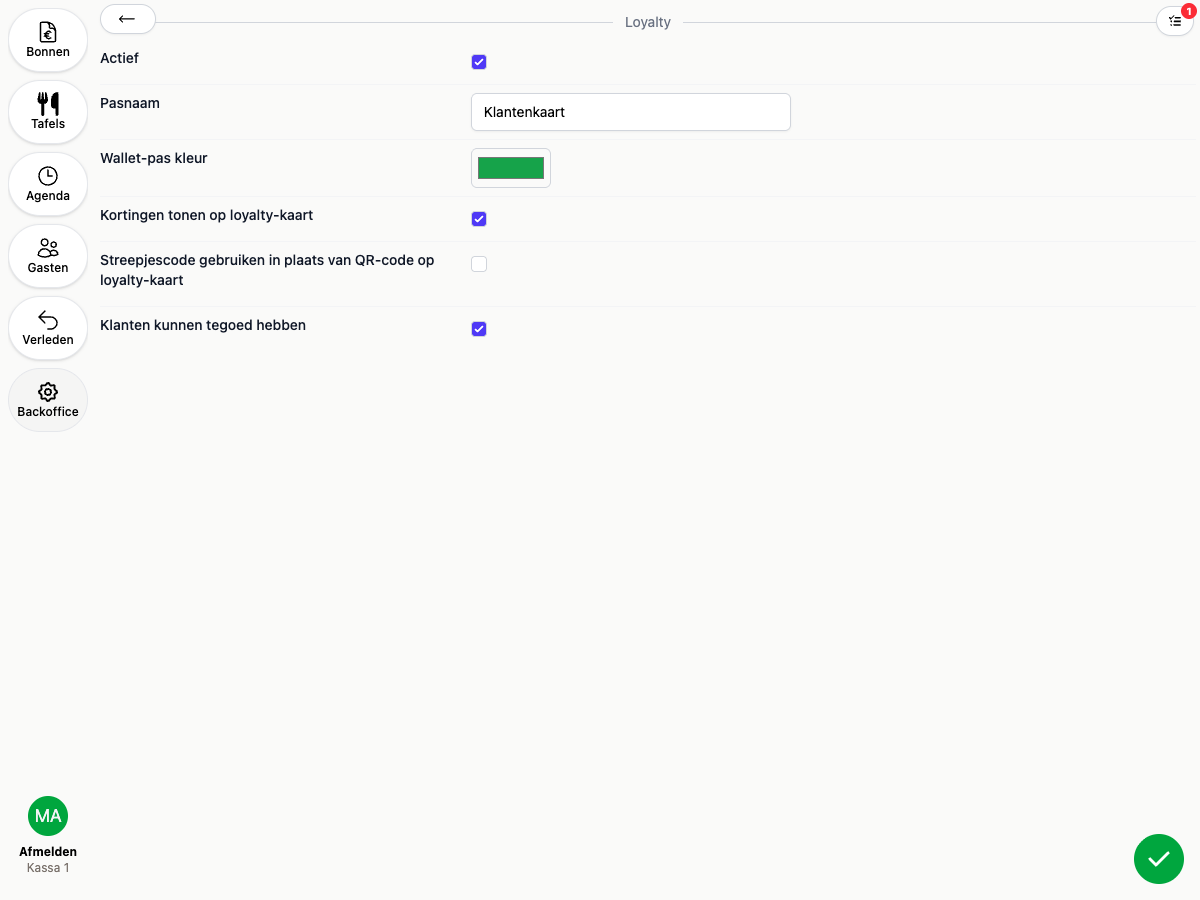
Once this is on, a Balance block shows up under the loyalty card on every customer profile, and Balance becomes available as a payment method at the till.
Setting permissions
Only staff with the right permission can top up a balance. Paying with an existing balance is available to anyone with the Payments permission, no separate role is needed for that.
- Open the Backoffice, go to Staff, then the Roles tab.
- Open a role (or create a new one) and check Manage balance under Permissions.
- Save with the green tick.
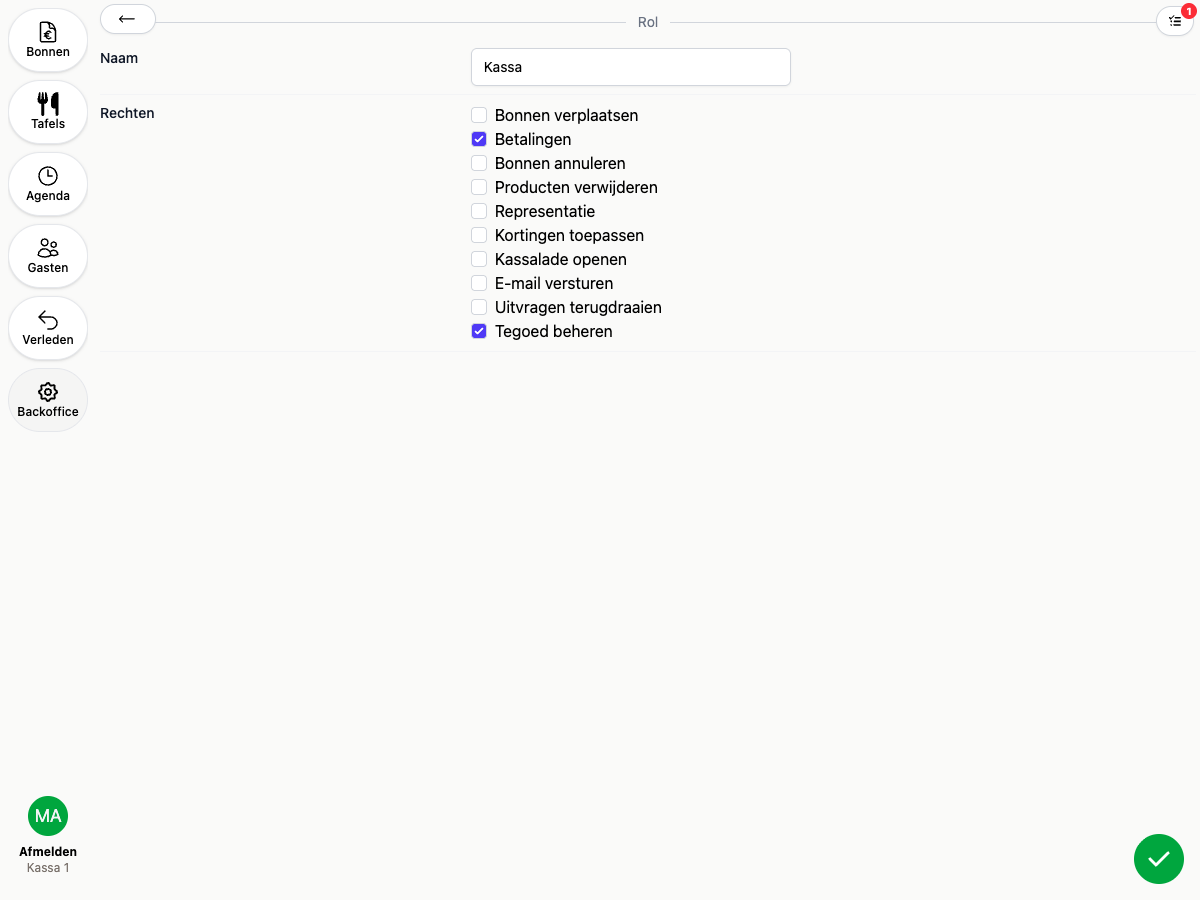
Only staff with a role that has this permission see Top up balance in a customer profile’s action menu.
Topping up a balance
- Open the customer’s profile and click the gear icon next to the loyalty card.
- Click Top up balance.
- Enter the amount and click Top up balance.
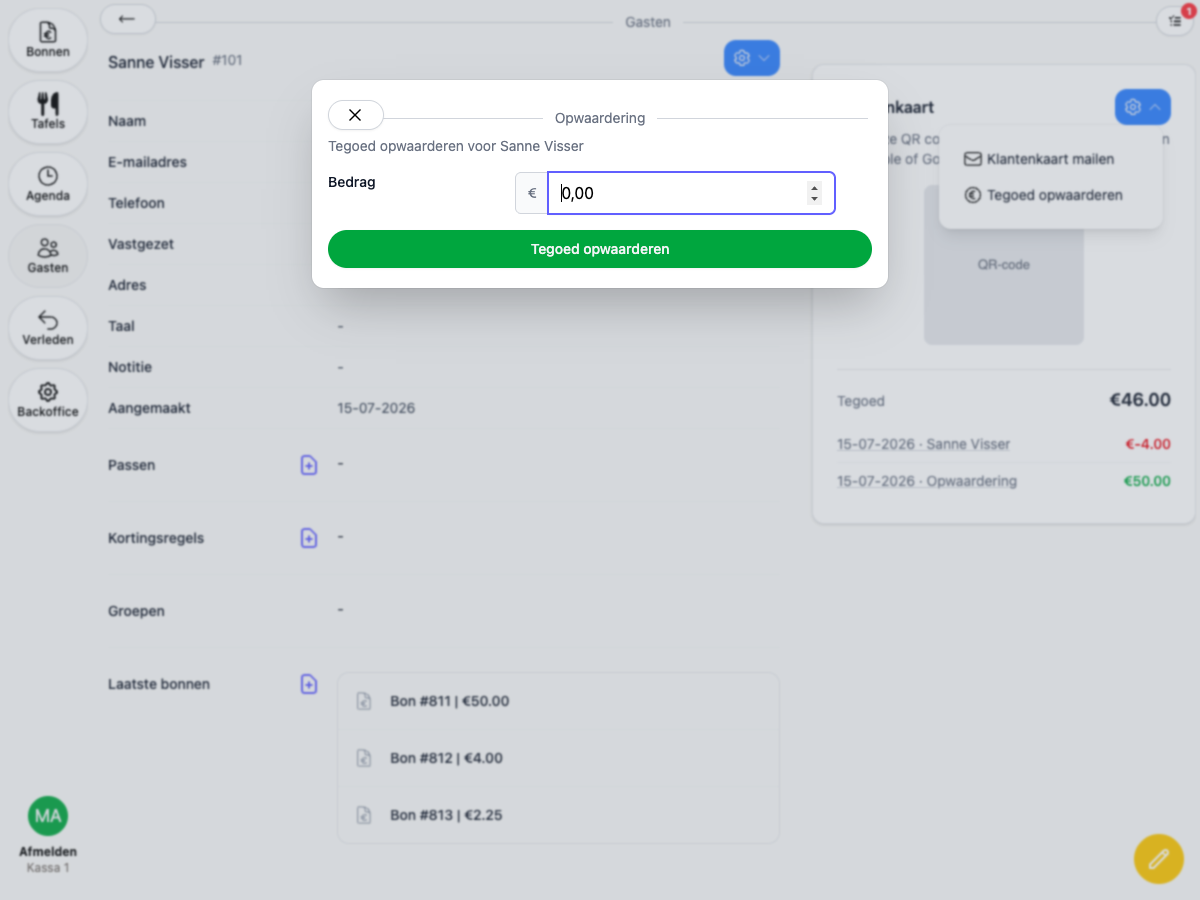
This creates a new receipt for that amount and sends you straight to Payment. Settle that receipt like a regular sale, for example with cash or card. The amount only counts toward the balance once that receipt is paid, so topping up is always a real payment from the customer, not an administrative adjustment.
Viewing balance and history
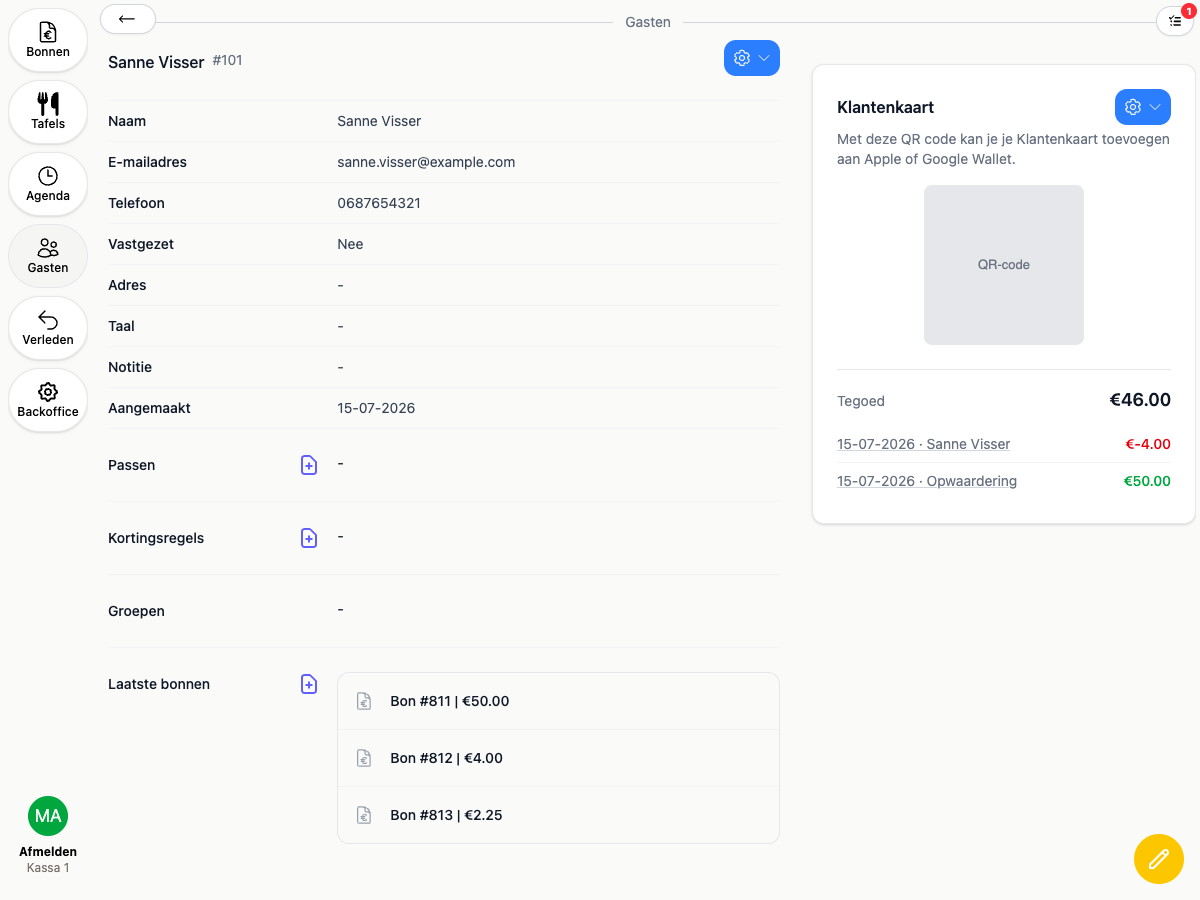
Once balance is enabled, the customer’s profile shows the current balance right under the loyalty card, with the latest top-ups and purchases below it. A top-up shows in green, a purchase in red. Click a row to jump to the underlying receipt.
Paying with balance
To pay with balance, the receipt needs to be linked to the customer, for example by putting the order on the customer’s name or scanning their customer card.
- Go to Payment on the receipt.
- Click Other and choose Balance.
- You’ll see a confirmation with the current balance, the amount due, and the remaining balance after payment. Click Add payment to confirm.
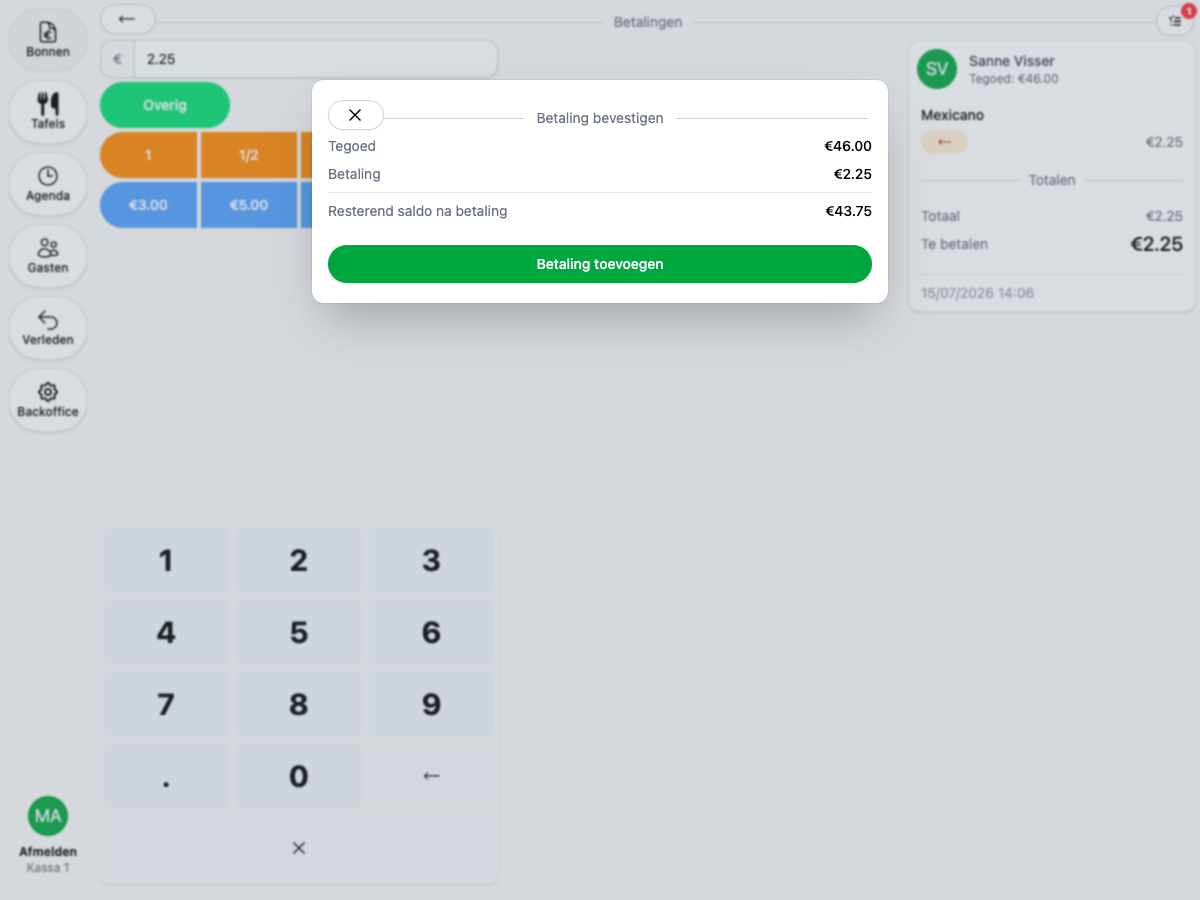
If the amount due is higher than the available balance, only the available balance is used automatically: you pay part with balance and settle the rest with another payment method. If the customer has no balance at all (still €0.00), Balance won’t even show up among the payment methods under Other: you’ll choose a different payment method right away.