
Floor plan
A floor plan shows you which tables are occupied at a glance, right on the layout of your venue. Head to the Backoffice and click Floor plan to create one.
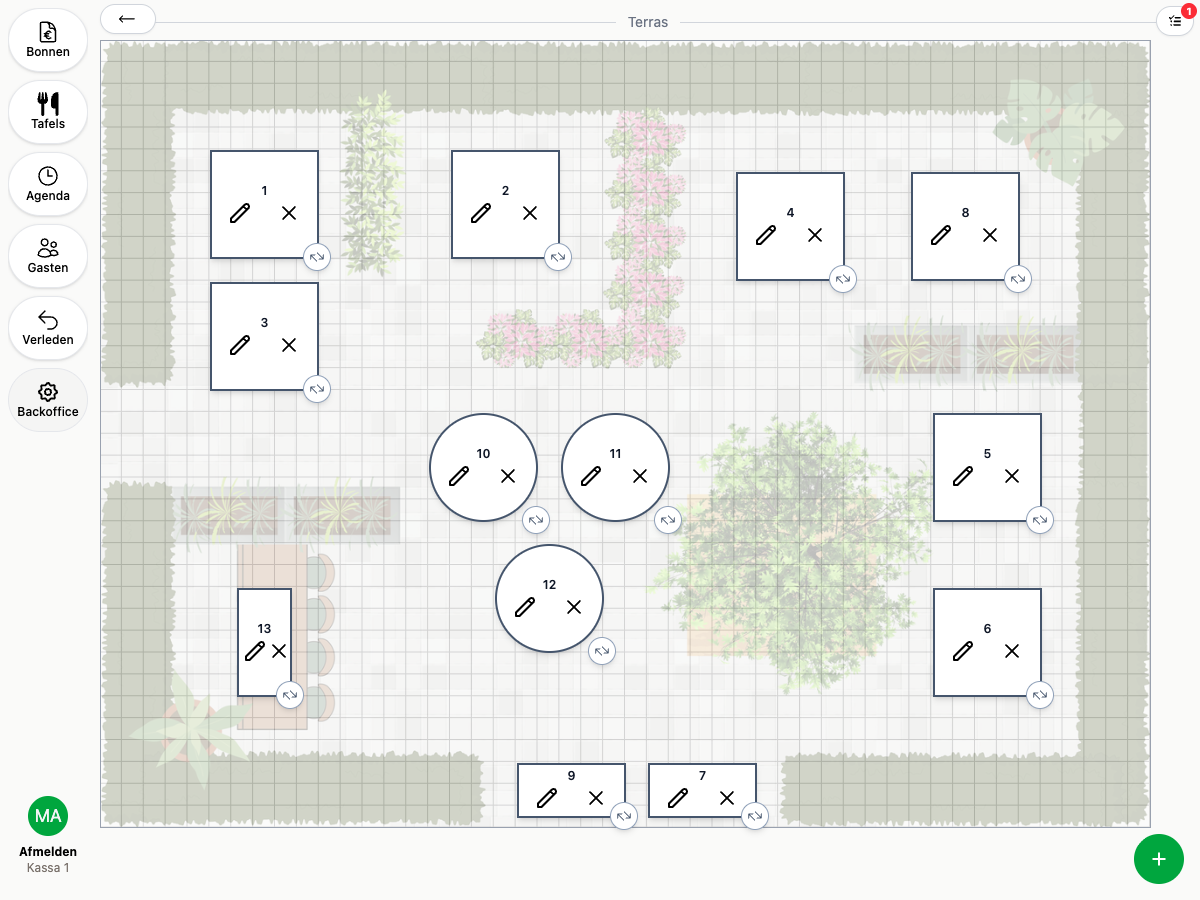
Creating a floor plan
- Click the round + in the bottom right
- Choose a name and the aspect ratio you want
- Optionally upload a photo or layout as the background
- Check Active to make this floor plan available as a view on the POS
- Save
Got more than one area? Create a separate floor plan for each.
Placing and dragging tables
- Open the floor plan and click the round + in the bottom right
- Pick a table that isn’t on the floor plan yet
- The table appears on the plan: drag it into place
Tables snap to a grid automatically, so everything stays neatly aligned. Drag the arrow on a table to resize it, or use the X to remove it from the plan.
Viewing the floor plan on the POS
Press and hold the Tables icon in the main menu on the POS to switch, just for yourself, between the list view and an active floor plan.
You can also set which screen opens first per device. Go to Backoffice > Devices, open the device, and set Default view to Floor plan. That device will then always open straight into the floor plan, instead of the bills overview, for example.